Apple OSX admin tips, running webmin, usermin and openSSL
Posted on April 27th, 2009
These are some notes I took whilst enabling remote https:// administration of my Mac running OSX. Webmin provides a nice web gui for administration of your server, but you would probably want to restrict access to localhost, a few known and trusted hosts, or IPs on the local lan subnet for security. In addition, using OpenSSL makes this a better solution, if you prefer a gui console or do not have access to ssh / command line. Newer versions will always come out, please check – and note that this information can only serve as a ‘rough guide’.
Some things you might find useful before we begin:
—-
Use NetInfo manager, authenticate and enable root user
http://forums.ionmac.com/lofiversion/index.php/t309.html
use
$ defaults write com.apple.finder ShowAllFiles -boolean YES
(instead of $ defaults write com.apple.finder ShowAllFiles True )
this is also cool
$ defaults write “Apple Global Domain” AppleScrollBarVariant DoubleBoth
—-
installing perl / Net_SSLeay for SSL access is easy – just visit http://www.webmin.com/osx.html and follow directions
These instructions, contributed by Kevin Capwell, will allow you to install webmin on any Apple Macintosh OS X server. The version that I was using is as follows:
Server: 10.3
Perl: 5.8.1-RC3 to see version open terminal,
$ cd /usr/bin, then type
$ perl –version
OpenSSL: 0.9.7b to see version open terminal,
$ cd /usr/bin, then type
$OpenSSL version
INSTALL DEVELOPER TOOLS (i.e. use OS X 10.3 XCode CD and update!)
1. Go to https://connect.apple.com/ and become a member of ADC – it’s free!
2. Click on ‘Download Software’.
3. Click on ‘Developer Tools’.
4. Download the Xcode Tools v1.0 and 1.0.1 update. As
of this writing download the Xcode CD is in 20 parts,
however, Xcode should come with your box copy of 10.3.
5. Click twice on the Xcode.dmg icon.
6. Click twice on the ‘Developer’ package.
7. Enter your administrator password when you are
prompted.
8. After selecting the drive to install the developer
tools, then click the ‘Customize’ button. Make sure
the check the BSD SDK option.
9. Perform the install.
INSTALL THE NET_SSLEAY.PM
1. Download and install the Perl Mod “Net::SSLeay”
2. Go to the web page
http://www.cpan.org/modules/by-module/Net/
3. Download the ‘Net_SSLeay.pm-1.25.tar.gz’. This version was tested with the perl and openssh that are installed with 10.3. In my case this is Perl 5.8.1 and
OpenSSL 0.9.7b (to see your versions look at the commands above)
4. I copied the Net_SSLeay.pm-1.25.tar.gz to /usr/local
5. tar -zxvf Net_ssleay.pm-1.25.tar.gz
6. cd Net_ssleay.pm-1.25
7. type ‘perl Makefile.PL -t’ (without the quotes builds and tests) You should see a successful install message
8. Issue the ‘sudo -s’ command (without the quotes) – enter your admin password. You should now see a root# prompt at the beginning of each line you type.
9. Type ‘make install’ (without the quotes).
10. If the command “perl -e ‘use Net::ssleay'” (without the “” quotes) doesn’t output any error message, then the ssl support that webmin needs is
properly installed.
INSTALL THE AUTHEN_PAM.PM
1. Download and install the Perl Mod “Authen::PAM”
2. Go to the web page
http://www.cpan.org/modules/by-module/Authen/
3. Download the ‘Authen-PAM-0.15.tar.gz’ file
4. I copied the Authen-PAM-0.15.tar.gz to /usr/local
5. tar -zxvf Authen-PAM-0.15.tar.gz
6. cd Authen-PAM-0.15
7. type ‘perl Makefile.PL -t’ (without the quotes builds and tests) You should see a successful install message
8. Issue the ‘sudo -s’ command (without the quotes) – enter your admin password. You should now see a root# prompt at the beginning of each line you type.
9. Type ‘make install’ (without the quotes).
INSTALL WEBMIN
1. Go to http://www.webmin.com/download.html
download the current Unix tar/gzip version.
2. I copied the webmin-1.340.tar.gz to /usr/local
3. tar -zxvf webmin-1.340.tar.gz
4. cd webmin-1.340
5. type ‘./setup.sh’ (without the quotes).
6. Accept defaults for config and log file directory (one return for each will do)..
7. Accept the default path to perl (it should test ok).
8. Accept the default port for webmin (port 10000).
9. Login name can be anything you want (the default is admin).
10. Login password can be anything you want. Then you will be asked to verify the password.
11. If you followed the instructions above correctly you will be prompted with ‘Use SSL (y/n):’ you can now answer Y. This will encrypt your connections with the Xserve.
12. Answer Y to Start Webmin at boot time.
13. After the install is complete, copy the file
pam-webmin to /etc/pam.d/webmin and re-start Webmin with /etc/webmin/stop ; /etc/webmin/start. This will enable PAM authentication, if you need it.
If everything installs correctly you will see ‘Webmin has been installed and started successfully. Use your web browser to go to:
https://:10000
and login with the name and password that you entered
previously.
INSTALL USERMIN
1. Go to http://www.webmin.com/udownload.html
download
the current Unix tar/gzip version.
2. I copied the usermin-1.270.tar.gz to /usr/local
3. tar -zxvf usermin-1.270.tar.gz
4. cd usermin-1.270
5. type ‘./setup.sh’ (without the quotes).
6. Accept defaults for config and log file directory (one return for each will do).
7. Accept the default path to perl (it should test ok).
8. Accept the default port for webmin (port 20000).
9. If you followed the instructions above correctly you will be prompted with ‘Use SSL (y/n):’ you can now answer Y. This will encrypt your connections with the Xserve.
10. After the install is complete, copy the file pam-usermin to /etc/pam.d/usermin and re-start Usermin with /etc/webmin/stop ; /etc/webmin/start. This will enable PAM authentication for all users who login.
Usermin is useful for changing passwords and (optionally) reading mail. It is a terrific user tool with security built in. I highly recommend that you
experiment with it for ease of use with your users.
Running Windows XP on Apple Mac
Posted on April 27th, 2009
A couple of people have asked me about running alternative OSes (such as XP) on OSX / Apple Macs, so I thought I’d add some info.
Whilst a user can *replace* OSX with XP as their primary Operating System (using Boot Camp – http://www.apple.com/uk/macosx/bootcamp/ to create their own custom boot disc from their original XP disc) I prefer to run Windows in a virtual machine *on top* of OSX, either in a window or full screen using Parallels Desktop for Mac . It costs about £50 (free trial period available) and can be purchased direct from Parallels online http://www.parallels.com/en/products/desktop/ or from the Apple Store (e.g. in Meadowhall or online http://store.apple.com/Apple/WebObjects/ukstore.woa/wa/RSLID?mco=6C04E07A&nplm=TK057 ) It is designed for INTEL Macs ( Mac Intel models) as it utilises the processor’s instruction set, for this reason it is NOT suitable for PPC / PowerPC / G3 G4 G5 models. It comes with USB / Audio / Network / Video drivers to bridge with the systems real hardware, and the user can set it up to use real disk and CD/DVD drives or emulated virtual ones.
If you wish to run alternative OSes on Non-Intel machines or even other UNIX / Linux / PC workstations, try the Open Source “BOCHS x86” instead: http://bochs.sourceforge.net/ or for a commercial offering try VMWare or Xen. I can report successfully running BeOS in a Bochs environment on an SGI Indigo2 R10000 250MHz MIPS system, and have a post coming with screenshots to show it in action.
I run Windows XP Pro SP2 under Parallels on a regular basis, and use the TCLIENT prugram in Ubuntu to connect to the pc via the RDC protocol (remote desktop connection), and have tried
other OSes in the virtual machine successfully, including Windows 2000 Advanced Server, although some flavours of Linux have not coped as well and baulked out during install. You can even run BlueOnyx linux!
Here is the official list of supported Operating Systems as of Feb 2007 – but I suspect some
considerable effort and technical ability may be required to get some of these listed actually working :
The current version of Parallels Desktop officially supports the following guest operating systems:
Microsoft Windows Guest Operating Systems:
Windows Vista
Windows Server 2003 Standard Edition SP0
Windows Server 2003 Standard Edition SP1
Windows Server 2003 Enterprise Edition SP0
Windows Server 2003 Enterprise Edition SP1
Windows Server 2003 Web Edition SP0
Windows Server 2003 Web Edition SP1
Windows XP SP2 Professional
Windows XP SP2 Home
Windows XP SP1 Professional
Windows XP SP1 Home
Windows XP SP0 Professional
Windows XP SP0 Home
Windows 2000 Professional Edition SP4
Windows 2000 Server SP4
Windows 2000 Advanced Server SP4
Windows NT Workstation 4.0 SP6
Windows NT Server 4.0 SP6
Windows ME
Windows 98
Windows 95
Windows 3.11
Windows 3.1
Linux Guest Operating Systems:
Red Hat Enterprise Linux WS4
Red Hat Enterprise Linux AS4
Red Hat Enterprise Linux WS3
Red Hat Enterprise Linux ES4
Red Hat Enterprise Linux ES3
Red Hat Linux 9
Red Hat Linux 8
Red Hat Linux 7.3
Debian Linux 3.1
Fedora Core Linux 4
Fedora Core Linux 3
SUSE Linux 10
SUSE Linux 9.3
SUSE Linux 9.2
SUSE Linux 9.1
SUSE Linux 9.0
Mandriva Linux 10.1
Mandriva Linux 10
Mandriva Linux 9.2
FreeBSD
Guest Operating Systems:
FreeBSD 5.4
FreeBSD 5.3
FreeBSD 4.5
FreeBSD 4.1
OS/2
and eComStation Guest Operating Systems:
OS/2 Warp 4.5
OS/2 Warp 4
OS/2 Warp 3
eComStation 1.2
eComStation 1.1
Sun
Solaris Guest Operating Systems:
Solaris 10
Solaris 9
MS-DOS
Guest Operating Systems:
MS-DOS 6.22
—

Coding is our passion
Usualy accompanied by a caffeinated beverage - although we’re more likely sipping a latte than some Jolt! cola these days!
If you found anything on this site useful and want to say thanks, then you could always:
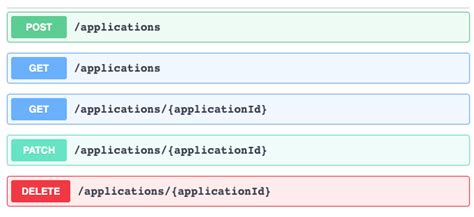
Microservices and RESTful APIs
We work with your company in a constructive way to refine your vision, exploring the Art-of-the-Possible, help write IaC (Infrastructure-as-Code) with Terraform, promote a DevOps culture and build a World Class Cloud Platform.
We can also provide help to go from the very basics of designing your API contract in Swagger/OAS to building a container by writing a Dockerfile, through to a creating a fully orchestrated CI/CD pipeline in Jenkins to deploy to Rancher, Kubernetes and Istio. We can help set up Kong API Gateways, and lots more besides!
More
Feedback:
“ Kevin is a highly talented developer with excellent dev ops skills and a passion for quality driven work flows. I've had the pleasure of working with Kevin and he has brought many new skills and approaches to the team. He is an undisputed GIT geek. Is overall nice guy dedicated to doing the best work he can do, and has been a great mentor to the less experienced team members. ”
– Stu Craigen
Donec dictum
-
The three pillars
-
Fusce ultrices fringilla metus
Donec leo, vivamus fermentum nibh in augue praesent a lacus at urna congue rutrum.
-
Donec dictum metus in sapien
Donec leo, vivamus fermentum nibh in augue praesent a lacus at urna congue rutrum.
Nulla leifend
Donec placerat odio vel elit. Nullam ante orci, pellentesque eget, tempus quis, ultrices in, est. Curabitur sit amet nulla. Nam in massa. Sed vel tellus. Curabitur sem urna, consequat.


